 There are a several different ways of using images and photos on Facebook, each of which has different dimensions and quirks. Some are for design and identity on the user interface, like your profile picture or cover photo. And it’s a great way to share photos.
Facebook has made some changes to its image sizes and layout recently, so here’s an updated 2013 version of the guide for Facebook image and photo sizes and types. Click here for the guide. Article by Mili of Schnauz Design
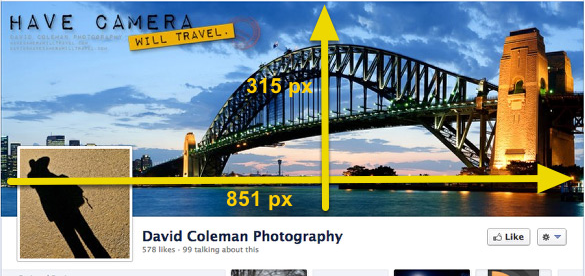
I thought it would be useful to solve the mystery and frustration around image sizes and formats once and for all. Clients often feel stumped when asked for high res images for marketing materials because the original designer or photographer cannot be located (an indication of their work ethic most times). So, let’s see what all these formats and sizes mean, and how to eliminate the source file issue altogether. When dealing with file formats and sizes, one size does NOT fit all. Requirements for Online – websites, facebook, twitter, pinterest etc: - Anytime you are going to put artwork or imagery on an online outlet like facebook, a website, blogs, pinterest, twitter etc. you will require 1 of 3 formats – jpeg, png or gif. - When you need to insert an image into a “template” of some kind (for example, a background for your twitter page, or the cover photo of your facebook page), you will need a particular height and width pixel size. But how do you know what the pixel size is? That information can be found on the support page of facebook or twitter, or simply google it. - The image must be created according to that size in 72 dpi. For example, facebook’s cover photo is 851px wide x 315px tall in 72 dpi. If this is built in a different dpi, it will become larger or smaller in width and height. Sometimes the website you are posting to is programmed to overcome this by cropping or downsizing the image, but it may not always happen proportionately, so it can look awful! Ever seen a website where the images are squished and look terrible? That’s because it is not programmed to proportionately size images. In this case, you have to size it correctly first and then upload the images. It’s a little bit like trying to squeeze and fit a large square shape into a small rectangle shape. Doesn’t work. - So how does one size images correctly? I personally use photoshop (which is an intense and expensive software to purchase if you are not using it a lot). Photoshop Elements is the simpler version for the general consumer. Requirements for Printing: - While images online are required to be 72 dpi, images and artwork that is printed needs to be 300 dpi. So if your designer tells you an image is too small for printing and they need a high res image, it means the image u have provided is likely pulled off a website, and they would need a much higher resolution image (possibly the source file). This is especially the case when logos are needed for an invitation design or something, clients send me logos pulled off company websites. - Photos should only be in jpeg, psd or tiff formats when used in marketing materials/printed materials. Png or gif cannot be used in print. Those are strictly web formats. - Sometimes a logo pulled off a website MAY be large enough to use in printed materials, if you only need it to be a small logo like .5″ x .5″. BUT, if that same logo needs to be blown up and printed on a large banner and need to be 10″ x 10″ it will be very pixelated when printed. Ever seen an image or logo look really fuzzy and pixelated when printed? It’s because of this. To ENSURE logos or other design elements besides photos print crystal clear, an .eps, .pdf, or .ai VECTOR format file is needed. This allows elements to be blown up as large as needed without becoming pixelated. I hope this helps clear some basic frustrations with sizes and formats. It is not easy to explain all of it in a blog post, as even some of these basics can have exceptions. By Mili of Schnauz Design QR codes are a bit of a ‘buzz word’ right now. As well as being hugely effective on your printed business literature, including a quick-response code on your business cards is a great way to get more bang for your buck. Including a QR code allows the recipient of your card to receive extra information. Whether it directs them to a specific page on your website or encourages them to sign up to your newsletter; they are one of the best ways to get something more out of a simple marketing tool. 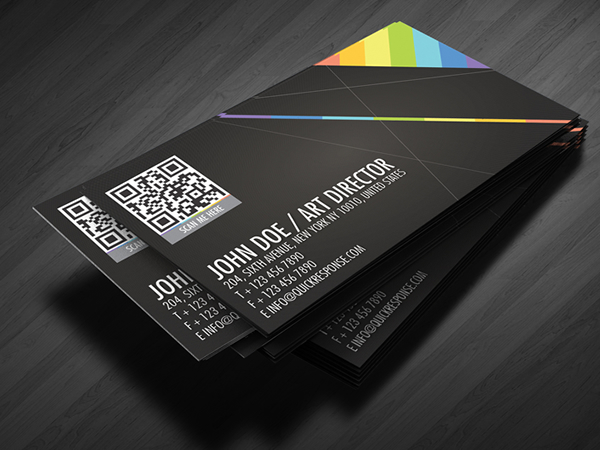
They add an air of mystery. What exactly will scanning it reveal? They encourage your prospects, peers, and customers to delve a little deeper into your business.
Space is limited on a business card. By including this simple design element, you can offer a wealth of information in a flash. In terms of making an impression and standing out from the crowd, this is one of the most simple but effective tactics you can use. - Courtesy of www.inspirationfeed.com. Written by Clare Evans for Charterprint. Want a QR Code created for you business? Want it incorporated onto your new marketing materials? Contact us today! In the world of real estate, business cards are among the top concerns. The level of competition among professional brokers or real estate agents is great and in order to rise above the crowd of real estate professionals, you need to shine in all aspect. Read more... 
In need of business cards? KrissArt Marketing Design provides eye-catching designs and high quality printing with FREE Shipping and a quick 2 day turnaround. Email us today for a free quote.
When another website links back to your site, search engines consider that "backlink" as a vote in favor of the content on your site. The more backlinks your website has from well-known and reputable sites, the higher it can rank in search results. Here, Search Engine Land editor Danny Sullivan offers tips for getting more backlinks and improving your site's SEO. - From www.entrepreneur.com |
AboutOwner, Krissy Carstens, providing the latest news regarding KrissArt's completed projects, Archives
March 2020
Categories
All
|

 RSS Feed